SmartBench needs to be homed and squared before it can do anything else, so you need to know what these procedures are and how to carry them out.
Homing and squaring are separate operations, but they affect each other and often need to be done together.
This article will introduce you to homing and squaring, and the rest of this guide will show you how to carry out these procedures.
What is homing?
Homing is an essential operation that SmartBench has to carry out to find its limits and set up its coordinate system in the X, Y and Z axes.
When SmartBench has homed, it will use the home position as its reference point for all of its movement.
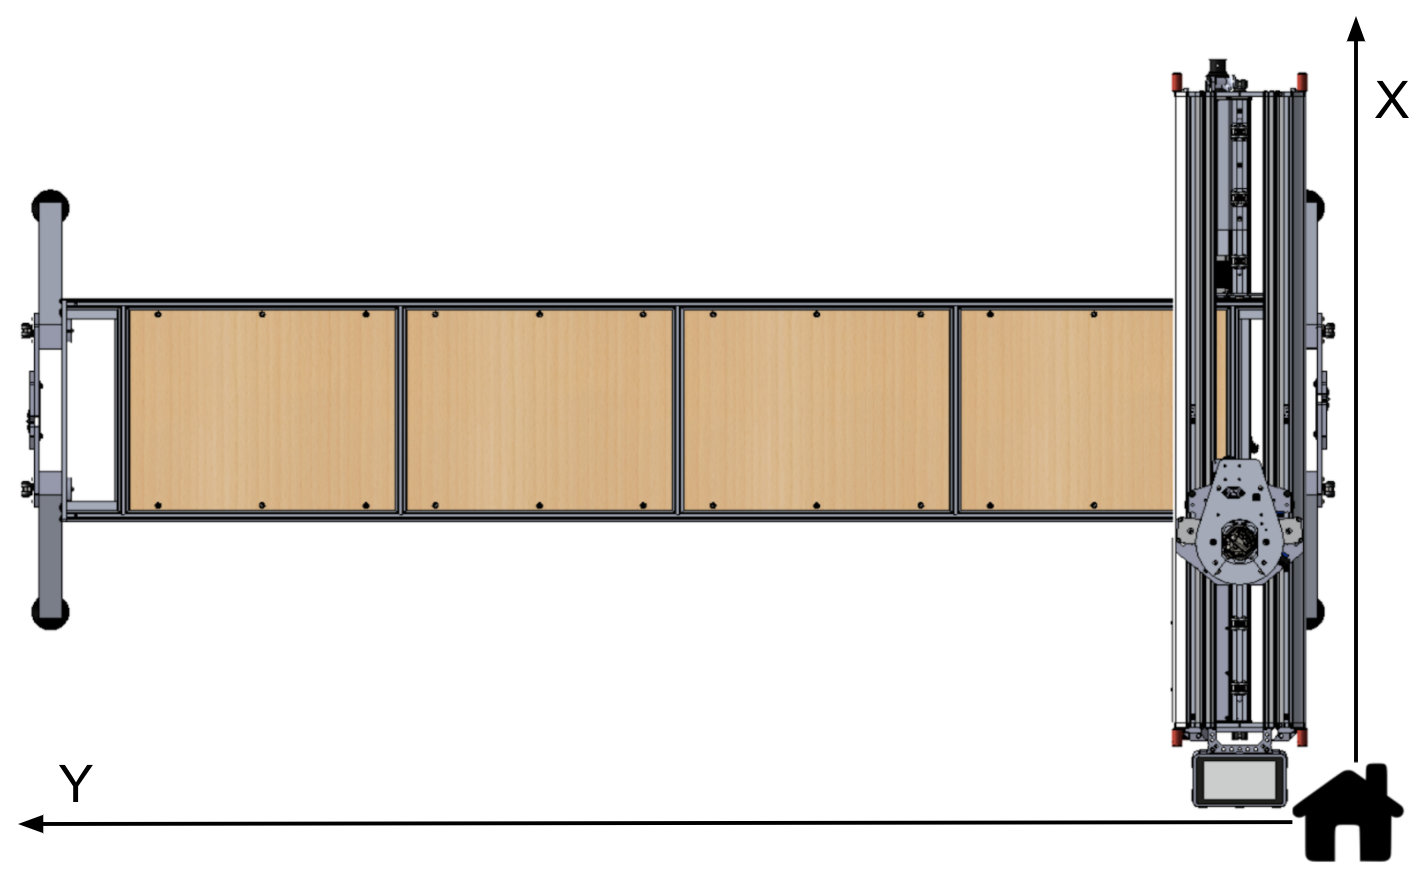
SmartBench will always set its home position in the same corner of its workspace.
Due to environmental changes and manufacturing tolerances, SmartBench’s home position (and therefore its coordinate system) may vary slightly between homing cycles. This variation is referred to as “homing tolerance”. |

When should I home SmartBench?
You need to home SmartBench every time you start it up or if SmartBench loses its position (e.g. after an alarm).
How do I home SmartBench?
Homing is an automated procedure that SmartBench will carry out itself.
Every time SmartBench starts up, the Console will invite you to home SmartBench.
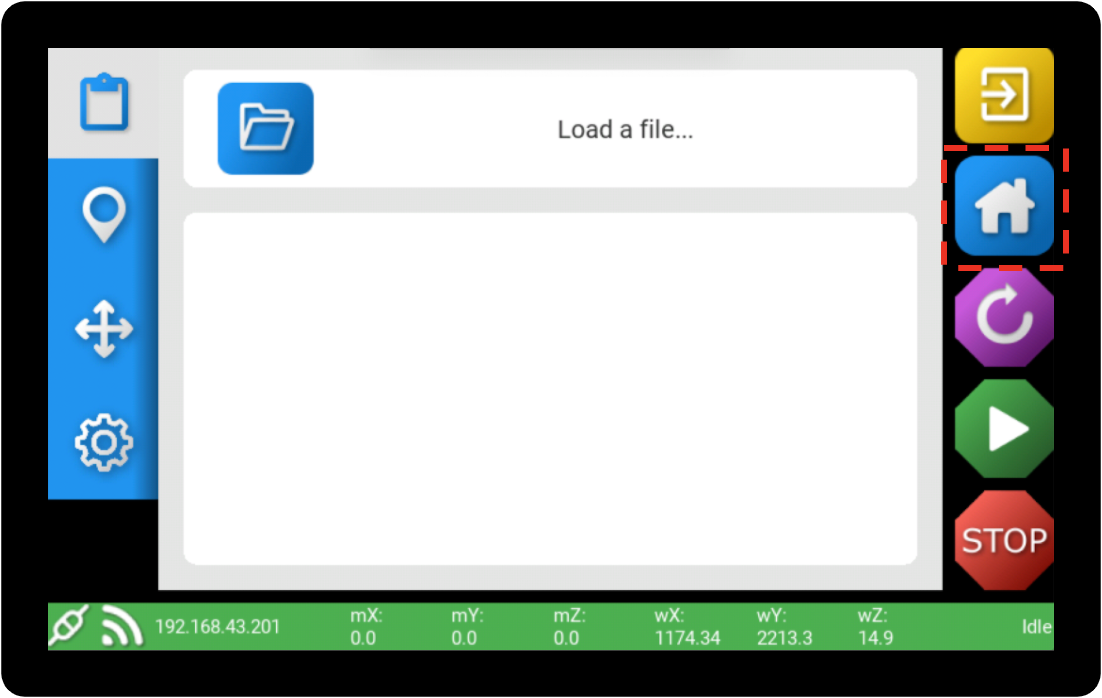
You can also home SmartBench at any time by pressing the home button in the PRO app sidebar.
What is squaring?
Squaring is the process through which SmartBench’s X axis is made perpendicular to SmartBench’s Y axis.
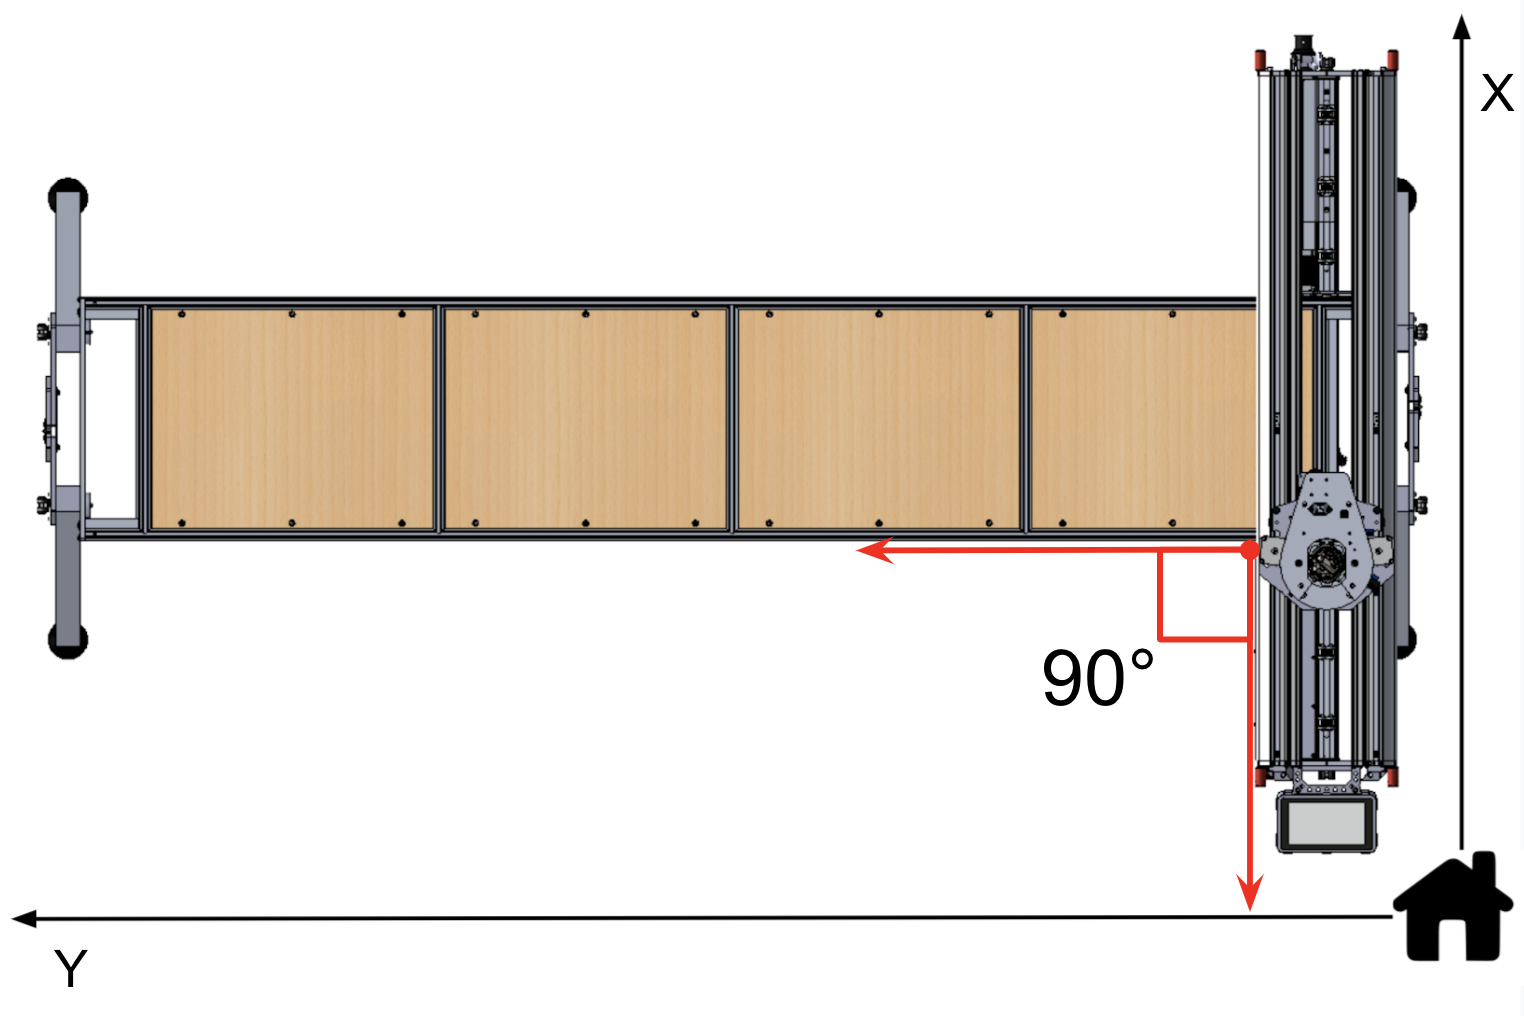
In a mechanically ideal world, the edge of the Y bench and the edge of the X beam would be at a perfect 90° angle to each other. |

When should I square SmartBench?
SmartBench needs to be squared prior to or during its start-up homing procedure, so that it can set up its coordinate system accurately.
How do I square SmartBench?
SmartBench can be squared manually by the operator for more precision; or it can automatically square itself, which is faster and easier for the operator.
What is manual squaring?
Manual squaring is the process through which the operator aligns the X Beam with the home end of the Y Bench.
The operator will physically push the X Beam against the Legs of the Y Bench, whilst SmartBench is switched off.
When SmartBench is switched back on, the motors will lock the manual alignment into place.
Manual squaring exerts less stress on the motors and results in better repeatability than auto-squaring. |

Note that the home end can be identified by the home label on the end of the Y Bench:
A: X Beam
B: Stepper motors
C: Legs

How to manually square SmartBench
Power off the SmartBench by shutting down the Console, and then pressing the power button.
Click here to learn more about powering down SmartBench.


If the extraction hose is connected to the Z Head, remove it now by rotating it anticlockwise and returning it to the extraction hose housing:


Now that SmartBench is powered off, the entire X Beam assembly can be moved along the Y axis by pulling it from the middle of the Lower X Beam:
D: Lower X Beam


Manually pull the X Beam up against the Y Bench Legs at the home end.
E: Y Bench
F: X Beam
G: Legs

Make sure that there is no gap between the Legs and the X Beam.
H: X Beam
I: Legs
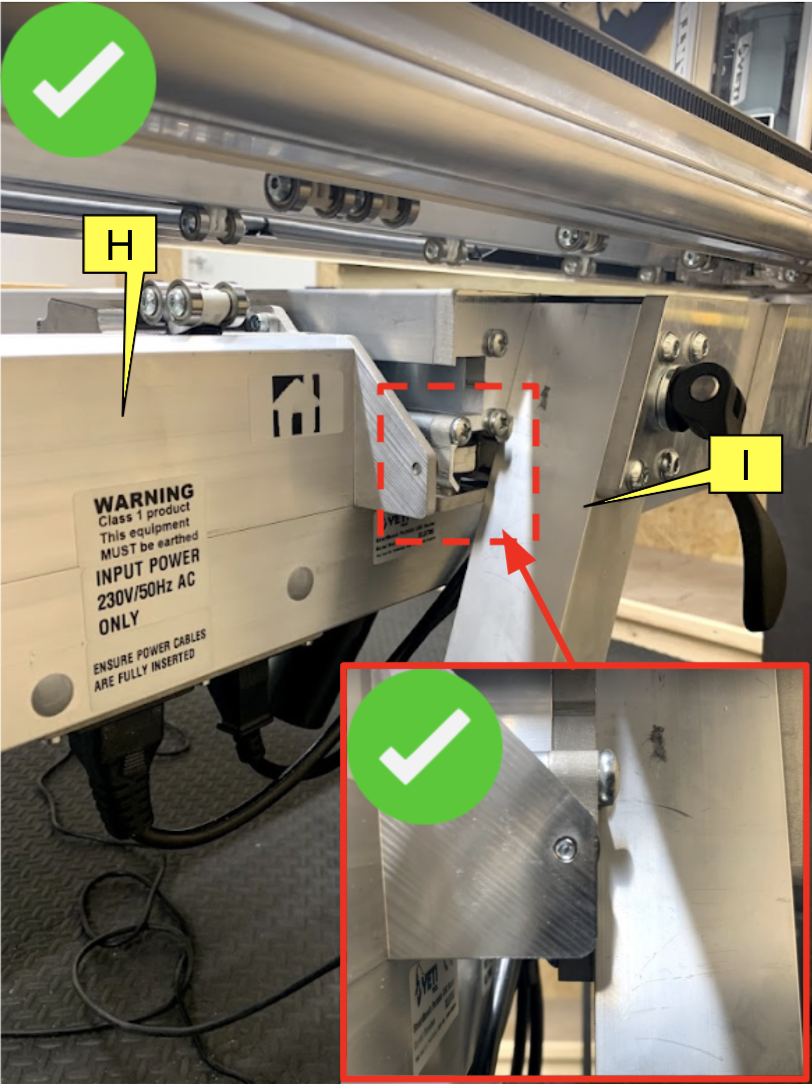
Leaving a gap between the Legs and the X Beam will result in incorrect homing, and SmartBench will not run squarely during operation. |

J: X Beam
K: Legs

When you are sure that the X Beam is completely in contact with the Legs of the Y Bench, you can turn on SmartBench.
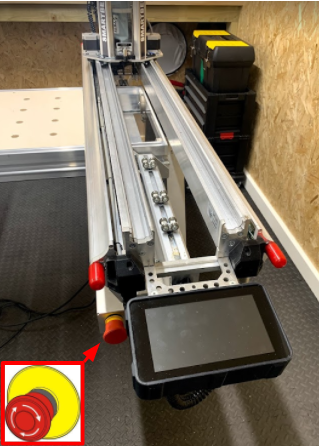
Turn on SmartBench by twisting the power button clockwise, and releasing it.

The powered motors will lock the X Beam into position.
The Z Head will light up yellow, and the Console will load up the safety screen.
Ensure that you pay close attention to this screen.
When you are ready to proceed, press the button at the bottom of the screen to confirm that you have read and understood the instruction manual.

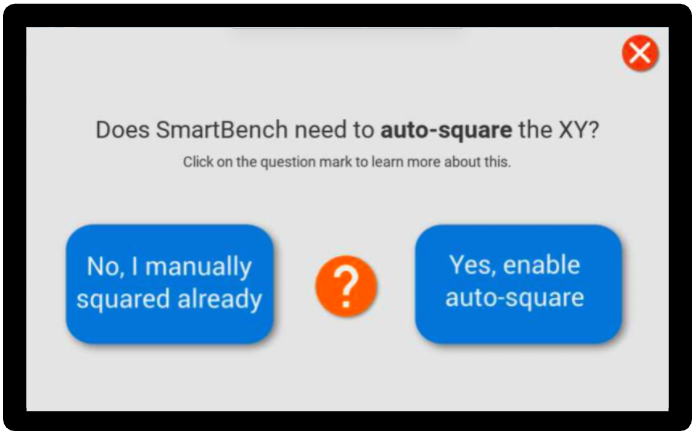
The following screen will ask you if SmartBench needs to auto-square the XY.
Press the “No, I manually squared already” button.

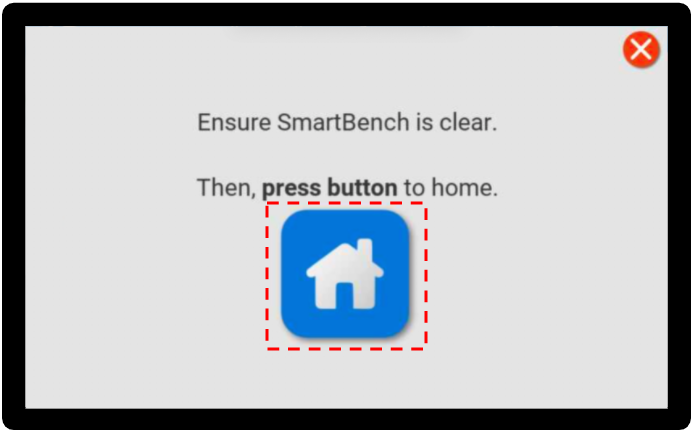
Ensure SmartBench is clear.
Look for any tools left on the bench, which could disrupt the homing process. |
A clear SmartBench should look like this:

Press the button in the middle of the screen to home.

This will start the homing process.

An orange light indicates that SmartBench is finding the home position.
The Z Head will move towards the home end of the Upper X Beam.

When SmartBench has finished homing, SmartBench will have a green light, and the Console will show the main menu screen.


SmartBench has been manually squared and homed, and now you can set up for your job.
What is auto-squaring?
Auto-squaring is the fastest and easiest way to square SmartBench.
The operator just needs to push a button on the Console, and SmartBench will square itself by overdriving the X Beam against the Legs of the Y Bench.
The squareness of SmartBench after auto-squaring is more approximate than after manual squaring, but it is more convenient and will be fine for general work.
Auto-squaring will put more stress on the motors than manual squaring. |

A: X Beam
B: Stepper motors
C: Legs

How to auto-square SmartBench
Turn on SmartBench by twisting the power button clockwise, and releasing it.
The Z Head will light up yellow, and the Console will load up the safety screen.

Ensure that you pay close attention to this screen.
When you are ready to proceed, press the button at the bottom of the screen to confirm that you have read and understood the instruction manual.

The following screen will ask you if SmartBench needs to auto-square the XY.
Press the “Yes, enable auto-square” button.

Ensure SmartBench is clear.
Look for any tools left on the bench, which could disrupt the squaring or homing process. |

A clear SmartBench should look like this:

If the extraction hose is connected to the Z Head, remove it now by rotating it anticlockwise and returning it to the extraction hose housing:


Press the button in the middle of the screen to home.

The Console will tell you when SmartBench is carrying out the squaring part of the homing process.
The auto-squaring process will drive the X beam into the Legs and create a loud stalling noise. This is completely normal, and nothing to worry about. |

The Lower X Beam will overdrive into the Legs and stall repeatedly, until the X Beam is roughly perpendicular to the Y axis.
The following images illustrate the motion that you will see while SmartBench squares itself.
A: X beam
B: Legs


After SmartBench has squared itself, it will automatically home itself.

When SmartBench has finished homing, SmartBench will have a green light, and the Console will show the main menu screen.


SmartBench has been auto-squared and homed, and now you can set up for your job.
If SmartBench is obstructed during a movement, it can lose position
If SmartBench loses position, it will not know this, and you will always need to rehome SmartBench before carrying out further operations (including setting any positional settings, such as datum positions).
If SmartBench loses squareness as well as position, you will also need to resquare SmartBench. If you resquare SmartBench, you will also need to home it again.
If SmartBench only loses position but not squareness (e.g., in the event of an alarm), you do not need to resquare SmartBench.
If you are doing precision work, the homing tolerance may affect your job if you rehome SmartBench part way through, and rehoming should therefore be avoided. If you are doing precision work with multiple stages (e.g. tool changes), do not power cycle or rehome SmartBench part way through. Should SmartBench lose position while you are doing precision work, you may be better off starting the project from scratch than trying to save it after rehoming. |

When might SmartBench lose position?
SmartBench will lose position:
In the event of a power cycle.
In the event of an alarm.
In the event of an axis stall.
In the event that an axis is knocked out of position by an external force (e.g. if the operator bumps into SmartBench).
How do I home SmartBench after start-up without resquaring?
You can rehome SmartBench at any time by pressing the home button in the PRO app.

You can access the PRO app from the Console lobby.

When do I also need to resquare SmartBench?
You will need to square SmartBench again if the X Beam gets driven or pushed out of place. This can sometimes be caused by an axis stall, or an accidental knock by the operator.
How do I square SmartBench after start-up?
If you are using Console software version v1.7.1 or earlier, you will need to power cycle SmartBench, and then either manually or auto-square it as you would normally.
If you are using a Console software version newer than v1.7.1, you can auto-square SmartBench without power cycling SmartBench.
If you want to manually square SmartBench again, you will always need to turn it off first.